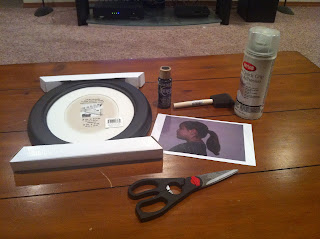
I decided to make this project for my sister. It was super easy and really fun! The hardest part was finding an oval frame to put the picture in. I plan on remembering this project and using it for myself with my own kids or for future presents.
I found this tutorial over at The Anderson Crew.
Here is what you'll need:
Oval picture frame (8x10)
spray adhesive
cardstock or regular paper
black paint/paint brush
scissors
picture of the special person (5x7)
1) Take a picture of person, print it out and cut - This took me a couple of tries, I had to make sure her pony tail was just right and wasn't touching her back, otherwise when I went to cut it out, it looked silly.
2) Paint the picture black and let dry - I went over mine a few times, I used regular paper, so it curled at first but after a couple of coats, it laid flat.
3) Once dry, spray the back of the picture with the adhesive spray, center onto white paper that came with frame and attach. (You don't have much time, so it's good to get an idea of where you want it before you press down)4) Put your frame back together and you're done!
I love the way this project turned out and it didn't take me more then 20 minutes tops. I'm not sure if my sister has put it up yet or not, but I know she loved it when she opened the present.


This was beautiful and yes Rita has put it up in her room....now where is mine?
ReplyDeleteLove you lots....mom
Maybe you'll get it next Christmas!
Delete